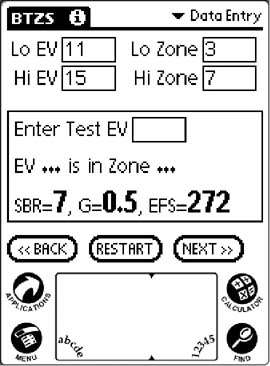
 If
you’ve chosen to work with the Zone System the next screen will be the one at
left.
If
you’ve chosen to work with the Zone System the next screen will be the one at
left.
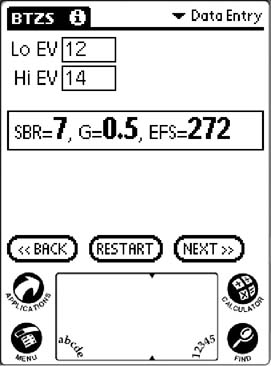 If
you’ve elected to use the Incident System you’ll see the screen at right.
If
you’ve elected to use the Incident System you’ll see the screen at right.
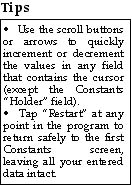
Enter the EV and/or Zone values by writing in the numerals section of the Graffiti area. The numbers you write will appear in the field that contains the blinking cursor. You can correct an entry by dragging across it to highlight the numbers, then writing the correction in the numeral section of the Graffiti writing area. You cannot write directly into the fields on the screen but you can use the scrolling arrows or the scrolling buttons to increment or decrement the values in any field (except the Constants “Holder” field) that contains the cursor. Scrolling will provide whole numbers in sequence but if you want to enter a decimal number you must use Graffiti.

 When
you’ve entered a satisfactory value tap on the next field to move the cursor,
and proceed. You can edit these numbers freely at any time and as soon as
sufficient information is available the program will calculate and display the
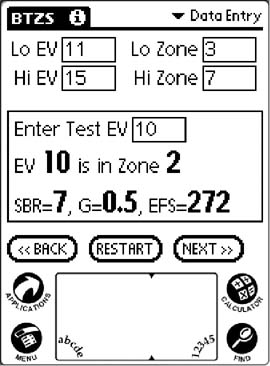
SBR. The Zone System “Data Entry” screen will also allow you to enter “test EV”
values to see what zones they may fall in. These predictions are not precise but
they’ll give you a general idea of the zone relationships.
When
you’ve entered a satisfactory value tap on the next field to move the cursor,
and proceed. You can edit these numbers freely at any time and as soon as
sufficient information is available the program will calculate and display the
SBR. The Zone System “Data Entry” screen will also allow you to enter “test EV”
values to see what zones they may fall in. These predictions are not precise but
they’ll give you a general idea of the zone relationships.